|
Introduction
World War II saw Britain produce some of the most beautiful
flying machines ever. This was piston engine time, though. Strangely enough, when
turbines came into fashion, British sense of aesthetics which gave us such wonders as the
Spitfire Mk IX (tall tail) or the E-type Jaguar got sometimes superseded by the renowned
sense of humor that gave the world the Monty Pythons or the Fairey Gannet. British
industry did produce beautiful jets - just think of the Hunter, or the Vulcan - but then
enjoyed a period of exotic and noisy designs, which sadly enough turned into a dull,
multi-national, lukewarm and just as noisy design trend.
The Lightning is the best illustration of this exotic
period : its configuration is unique - 60 degree swept back wings, engines mounted one on
top of the other, overwing tanks -, its front end reminds of a soviet concept while its
belly, specially in the last versions, makes you think of a fish ready to lay its eggs.
But its performance was sparkling: tough to beat in a dogfight, it could, even if
not so slightly modified, out climb an F-15 and gave deafened audiences tremendous routines
at air shows. As a matter of fact, I just love this airplane, and I am as happy as
can be Airfix released it in my favorite scale.
The Airplane
Towards the end of the Second World War, British Ministry of
Aircraft Production issued an ambitious specification. It was for a research
aircraft capable of attaining 1,000 mph at 36,000 feet, which never took off from the
drawing board. It nevertheless opened the door for new research aircraft
specifications, one of them being for a Mach 1.5 capable aircraft. English Electric won a
contract for such an aircraft, and designed a plane which was similar to the eventual
Lightning: incredibly swept-back wings, low set tail plane
and twin engines, set one above
the other.
This aircraft, the P.1, flew for the first time on 4
August 1954. Twenty three P.1B followed, which were the development aircraft, then
two P.1A were built, which had a reduced sweep on the outboard wings and a slight camber
on the leading edge. Unfortunately, on the day of the maiden flight of the first
P.1B, the splendidly uninspired White Paper entitled "Defense - An Outline of Future
Policy" was published. This document stated that manned aircraft were soon to
be replaced by missiles and that the P.1 would not have any successor. As it was
said by the author of the paper about the P.1, "Unfortunately, it has gone too far to
cancel". More unfortunately, this led the then christened Lightning - Excalibur
had been rejected - to remain seen as a stop gap aircraft, just here for the pilots to
fool around with, while they waited for an early retirement under a sky protected by those
almighty missiles.
The Lightning F1 entered service under such benevolent
eyes, and was qualified as an "austere interceptor". It looked very much
like the P.1B, had a reliability that would have made the early F-14 ground crews burst
out laughing, and could easily intercept any flying target provided it flew within the
airfield boundaries. After production of 19 F1's, the F1A entered service, and had
provision for a detachable in-flight refueling probe. It could now intercept any
flying target, provided there was a tanker above the airfield. F2 soon followed,
with a new engine and better avionics.
The T4, two seat side by side trainer, lowered pilots
stress level when trying to qualify on the beast. The F3, which was to be the
definitive Lightning, featured an enlarged, though shorter, tailfin and new engines that
could withstand any mistreatment in flight, which would have made any early F-14 aircrew
burst into tears. The refueling probe was a standard fit.
A T5 variant was derived from the F3, and then appeared
the F6: it had all the features English Electric engineers had designed for the P.1A:
enlarged ventral tank, cambered wing, over wing tanks and fuel-filled flaps. The last
RAF flight occurred on June 30, 1988. Some Lightnings saw service for British
Aerospace, and played radar target for their successor, the not-quite-so-impressive
Tornado F3.
There are now a couple of theoretically flyable
Lightnings in UK - if only the CAA could allow them to fly - , and a T5 flew in March this
year, but in South Africa. Right time zone for me, wrong hemisphere.
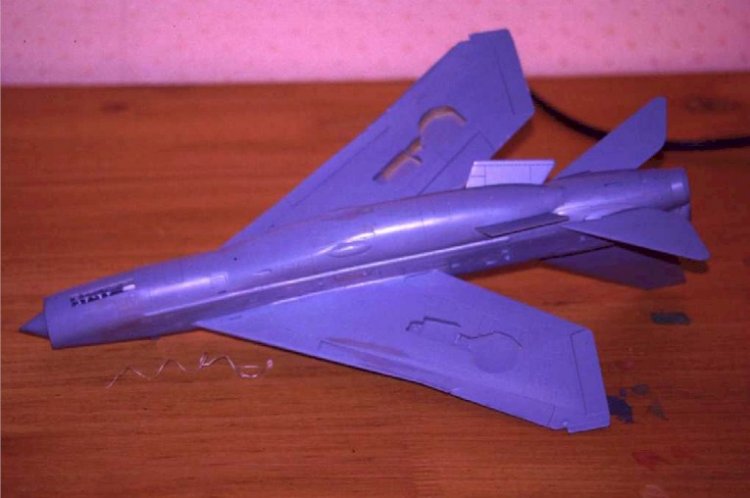
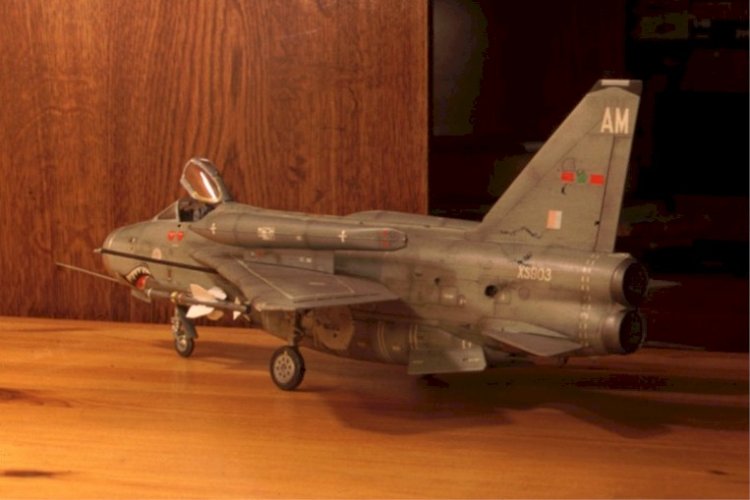
The Model
Airfix released in 1997 two kits: a F1/F2/F3, and a F2A/F6. The
boxes are massive, but really larger than the sprues. The most impressive thing in it is
the decal sheet: when you combine both kits, you can build a Lightning from any unit that
flew it. 7 options are proposed for the F2A/F6, 6 for the F1/F2/F3. I haven't started my
F1/F2/F3 yet, so I cannot comment about it.
About the F2A/F6, part breakdown shows the will to use
common molds as often as possible: there are parts for upper-nose guns, under-nose guns,
fairing for each of those, and a belly tank with or without the gun pack. When
seeing this, I started worrying about my putty tube. When you look more closely at
the parts, you realize the molding is crisp, panel lines are recessed, you got a kit in
the same class as the Spitfire and Seafire Airfix released earlier.
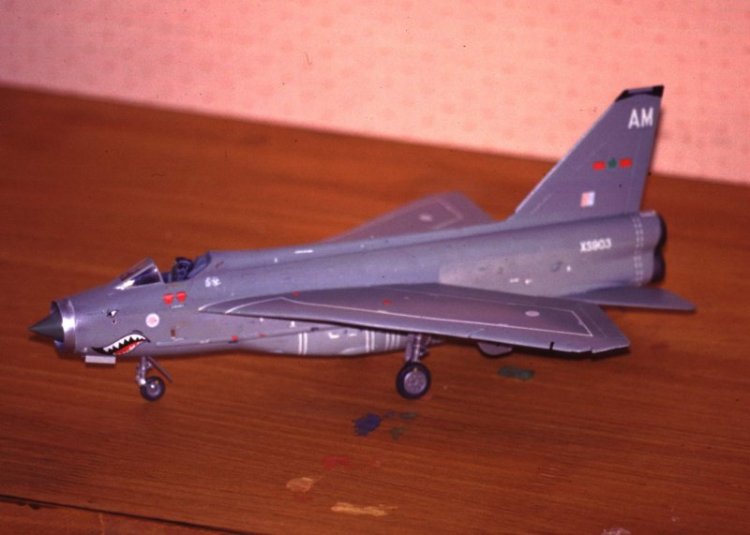
I didn't like much the decals proposed for the cockpit,
so I chose to use Eduard photo-etch set for the F2A/F6, and as I'm lazy as any good
southern Frenchie, I chose to use EZ masks. I opted for a 3-tone low-viz scheme, as
I thought it precisely didn't fit the shape of the Lightning, and that the gaudy shark
mouth there was on the sheet precisely that did.
Construction
As I can be amazingly devoid of imagination, I closely
followed Airfix's instruction sheet. I began with the seat, from which I cut all
ejection handles, as they were replaced by the nicer ones from Eduard. The belts
were from Eduard's set, and the thirteen parts they are made of prompted me to use a
language my karma should suffer of for a couple of decades. I grinded away every
surface detail from the consoles and the instrument panel and glued Eduard parts in place.
The throttles and various handles and levers protruding from the side consoles had
a similar effect on me than the belts.
I
obeyed Airfix instructions about the painting of the
cockpit. Belts were painted olive drab, and the buckles silver. I assembled
then the intake duct, and stuffed it with lead before gluing the nose cone in place.
Please put a lot of ballast in there, as this kit IS tail-heavy. I learned it
the hard way, and had to put lead in the missile bodies. I sawed off the kit
nozzles, and bent Eduard's ones and glued them in place. They are gorgeous, but
invisible once you have closed the fuselage. They were painted using Testors
Metallizer Burnt Metal. I drilled the various holes for the auxiliary intakes, and
for the exterior piping specific to the F6. Then I dry fitted the cockpit assembly,
the air intakes and the fuselage halves.
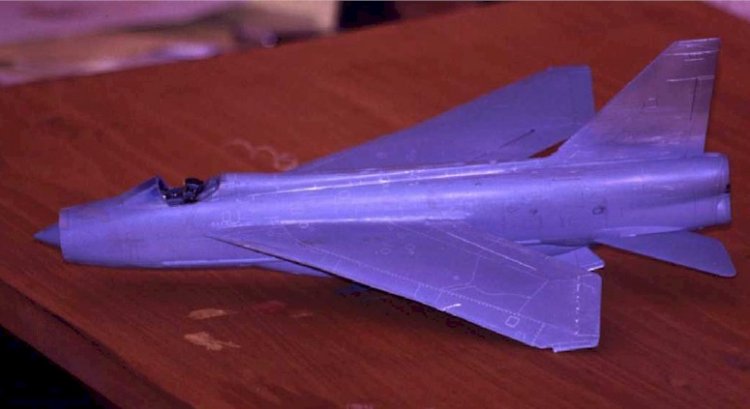
Trouble was brewing: there were ugly gaps
at the joint
between the fuselage and the front undercarriage bay, and when I held together the
fuselage halves at one end, I had them an inch apart at the other end. First problem
was addressed by using thin styrene sheet, and the other by gluing
one inch at a time, and
letting it thoroughly dry. A bit of putty was needed at the joint, though. The
wings brought their fair share of filing, sanding and filling, as the main parts are
standard for the F2A and the F6, but the leading edge is not. The mating of the
wings to the fuselage needs some puttying, too. The worst part of it was assembling
the ventral gun pack to the fuselage, as there are lots of panel lines there, and you have
to go light on the sanding. I didn't see any picture of parked Lightnings with
airbrakes deployed, so I decided to shut them. Fitting them flush to the fuselage
was rather troublesome, too.
I went then to the main undercarriage. I added to
the legs the brake fluid pipe, and three collars to hold it on the upper part of the leg.
You can see these collars in REPLIC #81. All legs and wheel hubs were painted
Testors Metallizer Aluminum, and the tyres were Aeromaster Enamel Tyre Black. I set
aside the undercarriage, and went on painting the model. Still imagination-free, I
used Humbrol colors. Now, I have a reason for hating airbrushing Humbrol
paints. Next time, it'll be Gunze!
I then sprayed a coat of Johnson's Klir (Frog for
Future). I used the decals straight from Airfix sheet, and they went smoothly, but
had to be helped by a fair amount of Aeroset/Aerosol. The air intake ring was
painted at this time, using the good old Humbrol number 11. I glued the
undercarriage in place at that moment (silly me), and experienced an unusual amount of
doubt, fear, and rage, all of them mixed, because Airfix's instructions are almost
anything but explicit. A thorough review of the available documents helped me
correctly assembling the main undercarriage legs. A coat of Aeromaster matt varnish
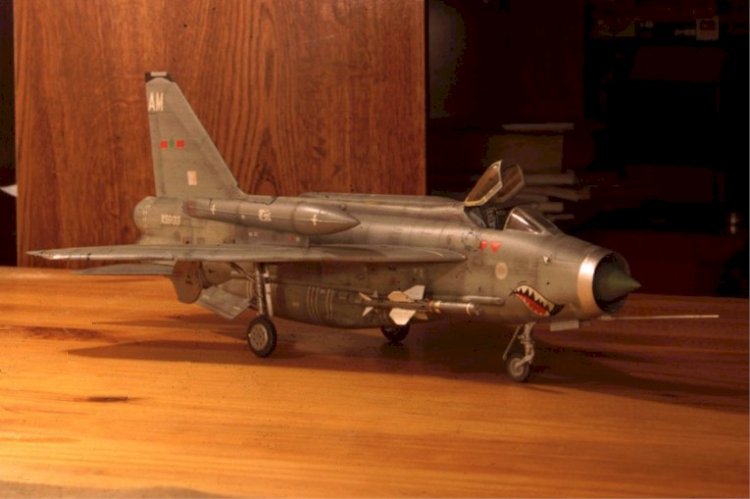
followed. I installed the IFR probe then, and went on weathering the beast. I
used powdered pastel chalk, which I ran in the panel lines with a brush before wiping the
excess away, following the airflow. Another coat of varnish, and the lead-filled
Redtops were finally glued in place.
Overall
The British Lightning is one of the most astounding flying
machines ever. This Airfix kit is a pretty good one, warts and all. I will do
another one, as an early bird, and I already have Aeroclub and CMK conversions for T4/T5.
Here is an aircraft with an unusual look, and a 40$+ kit which, even if not
Tami-gawa
like, really gives justice to it. I have already bought two of them, and I will gladly buy
two more.
Sources
Wings Of Fame Vol 7
Replic #81
Damien Burke's Lightning page
Sebastien
|
|