|
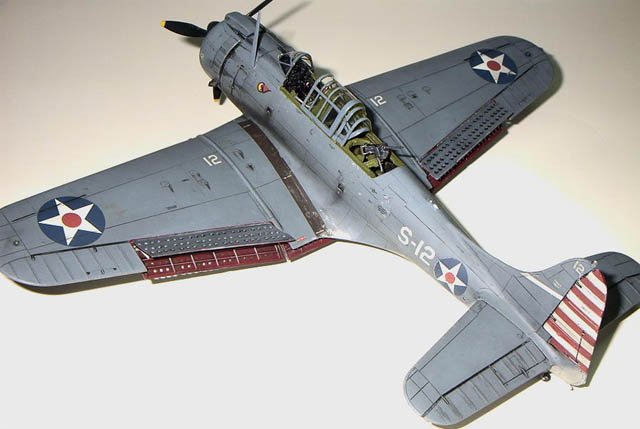
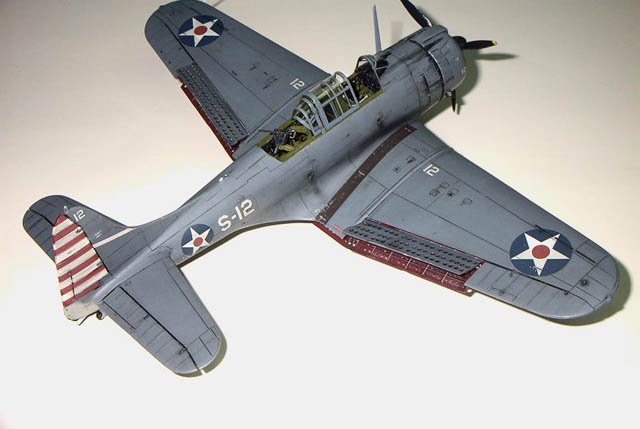
This is Accurate Miniatures' excellent SBD-3
Dauntless built straight from the box. As we have all come to expect from
Accurate Miniatures the kit has great detail and fit.
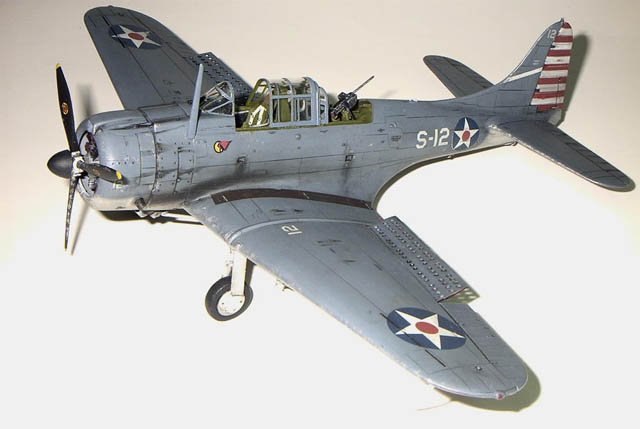
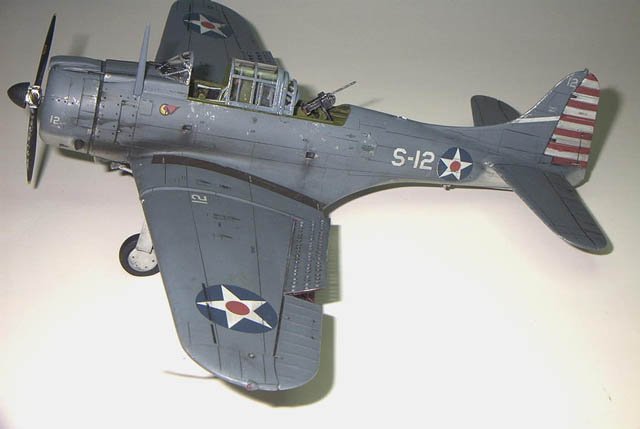
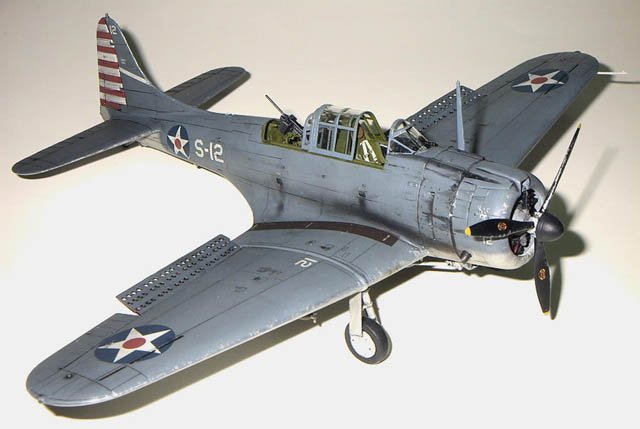
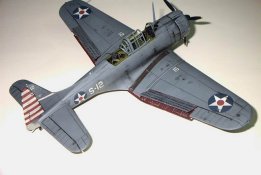
The cockpit is well detailed
and construction is very straight forward with the exception of a few tricky
spots. The cockpit is painted overall Interior Green (the canopy frames were
also masked off and painted interior green at this time, with the windshield
piece being flat black) with various console boxes painted black.
Each piece was given a dark brown artist acrylic wash and drybrushed with
Floquil Bright Silver. A decal is provided for the instrument panel but
is of no use since it doesn't have any features on it. I chose to paint the
panel black and pick out the instrument detail by drybrushing the raised
detail white then drybrushing the entire panel lightly with Floquil Bright
Silver. There is a decal for the seatbelt which I used. I carefully cut
the decal and its backing paper away from the decal sheet and glued it to the
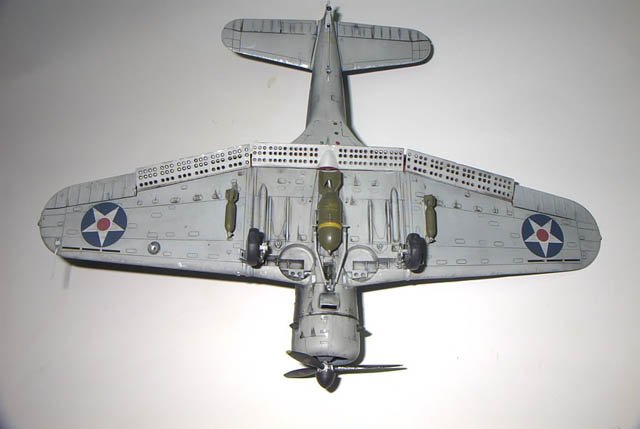
seat. I then painted the interior of the dive flaps Model Master Insignia Red
FS 31136.
|
Click on images below to
see larger images |
 |
 |
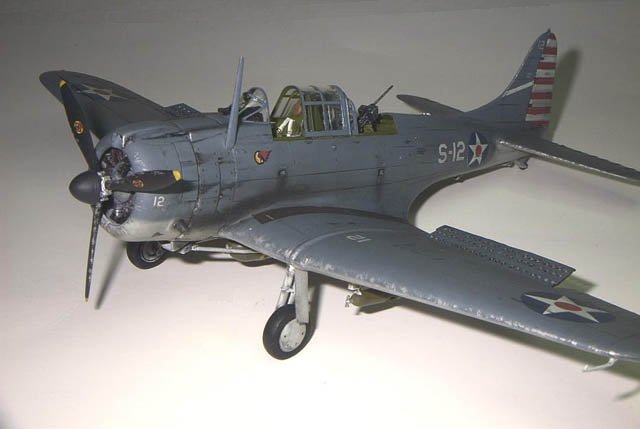
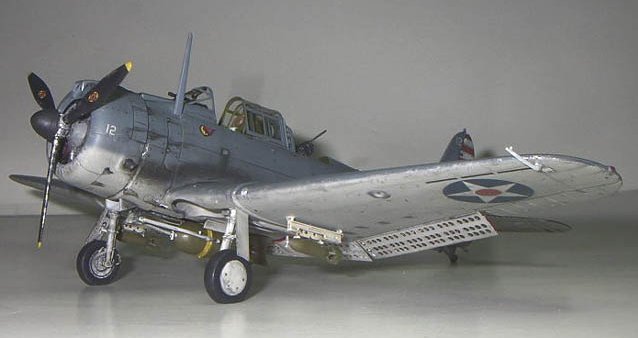
The engine is good and includes
push-rods and ignition wires. The engine was painted then assembled along
with the cowlings and forward fuselage halves.
Fit of the fuselage and wing halves
was good and did not require filling. I first assembled the fuselage assembly
and glued the lower wing half in place, then glued the right and left upper
wing halves in place as per the instructions, the centerline bomb fairing was
also glued in place at this time. I then glued the forward fuselage to
the fuselage and the engine and cowling assemblies to that, with the gun deck
glued to the top of the fuselage. The horizontal stabilizers were assembled
and all of the seams were cleaned up. With the gluing of the horizontal stabilizers to the fuselage assembly was complete.
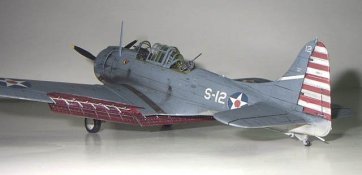
I painted the model using Model
Master enamels. The undersides of the model, including the landing gear struts were
sprayed first using Model Master Light Grey FS 36495. The upper surfaces, and
canopy frames were sprayed next using Model Master Intermediate Blue FS
35164 with a drop of Gunship Grey added (I know it isn't exactly the correct
color but I don't care, I like it). The prop was also sprayed flat black with
yellow tips at this time. I sprayed on a coat of Future Floor Polish to
provide a nice smooth glossy surface for decaling, and to protect the paint
from the oil wash that would be applied.
|
Click on images below to
see larger images |
 |
 |
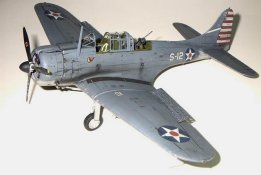
The decals supplied in the kit
are very nice, they are thin, conform to detail well, and are on register.
They do however have a slight tendency for the pigment to smear if too
much decal solvent is used. I did not have as much trouble with the red
and white rudder ident. stripes as I thought I would, they took some time but
settled down well.
The model was weathered using 3
techniques. An artist oil wash consisting of 3 colors,Lamp Black, Burnt
Sienna, and Raw Umber, was used to bring up the panel lines, I gave the
interior of the dive flaps and the gear the was at this time also. The same
wash was used for the oil streaks by putting a small drop of paint on the
surface and pulling it back with Q-Tips and paper towels. Next I used Doc
O'Brien's Weathering Powders, a powder similar to pastel chalks but oil based
and pre-ground, to simulate the exhaust and gun stains. The chipped paint
effect was done using a stubble brush and Floquil Bright Silver.
Polly Scale Clear Flat was used
for the flat coat. The clear parts were dipped in Future and left to dry. The
canopy frames were brushed with Polly Scale Clear Flat for a flat finish. All
of the clear pieces were then attached to the model. After the flat coat was
applied all of the external details were painted, and the final assembly was
done.
Rob
|