|
Here it is, the
Airfix 1/24 scale Hawker Hurricane as promised to all the good folks that
appreciated my last creation, the Airfix 1/24 scale Messershmitt
Bf-109E featured here in ARC in 2002. This diorama was titled,
“Bloody
Hell, No Bandits Yet”.
This
diorama won First Place War Scene Diorama in the PR Scale Model quarterly
competition held 20 July 2003.
This model, just
like all the 1/24 scale line from Airfix, was pretty detailed, with clean
recessed lines and plenty of raised rivets everywhere. Cockpit, engine and gun
bay details were pretty good, but it just cried out for more detailing. Being
such a large scale, (my favorite), I decided to add more details to the whole
model. Regrettably, the Waldron instrument and buckle sets are the only
accessories available in this scale, therefore, time for the good old inventive
and scratch building, but more details about that later.
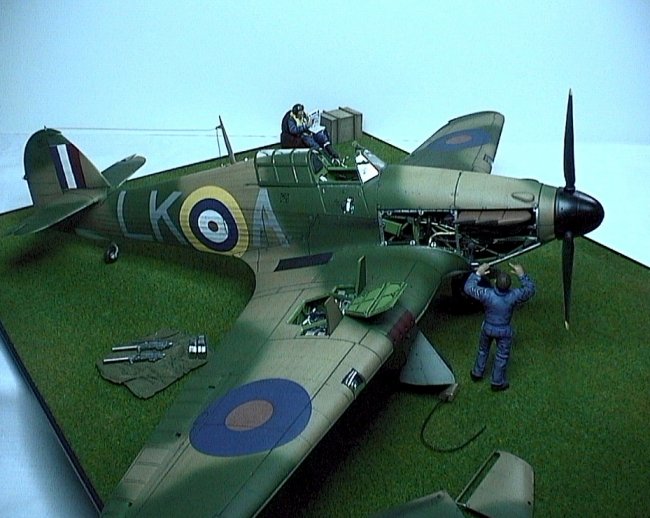
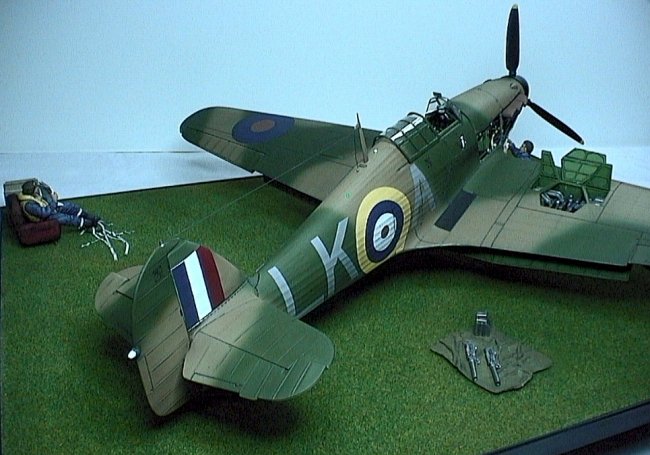
Like all my models, I like to
place the scene in a moment in history. In this case we have a Hawker Hurricane
Mk.1 from 87th Sqn based at Exeter Airfield. This particular plane
was flown by Flt. Lt. (later Wing Commander) I.R. Gleed D.F.C. This Hurricane,
number P2798, was allocated on May 18 1940, and was the one where Gleed scored
many of his 15 victories, many of these during the Battle of Britain.
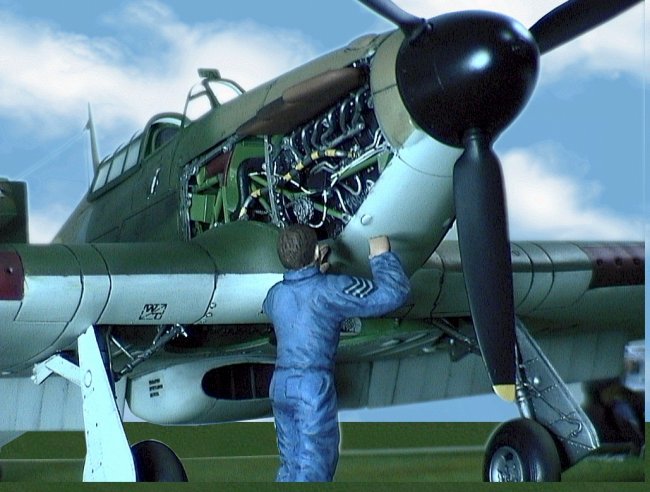
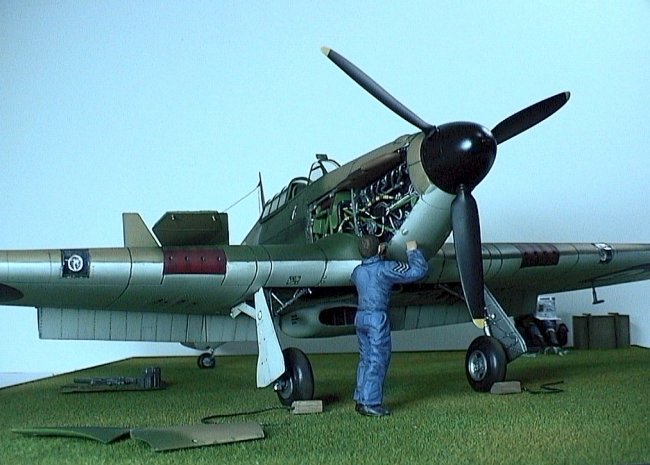
The diorama, even thus simple in
nature, presents the usual scene at any RAF airfield during the Battle of
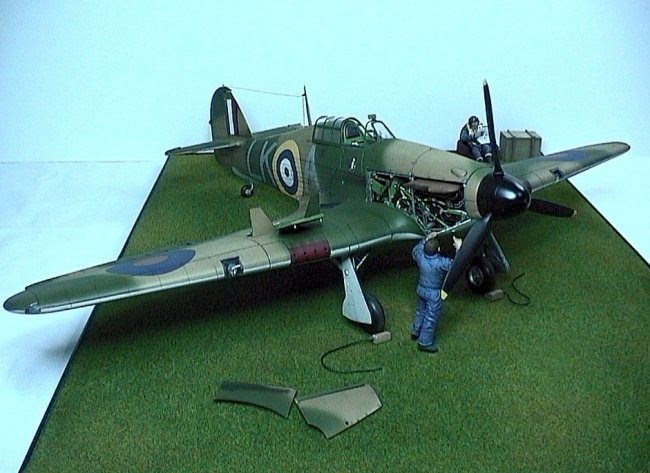
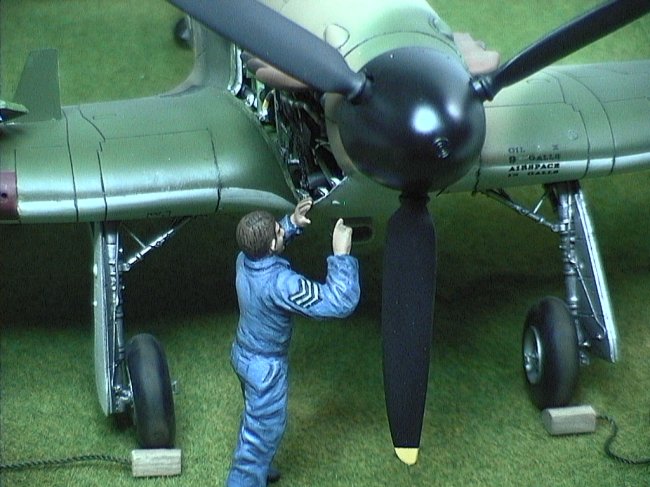
Britain. In this particular scene, the aircraft crew chief if finalizing a
functional check and ammo loading, getting the plane ready for the next alert.
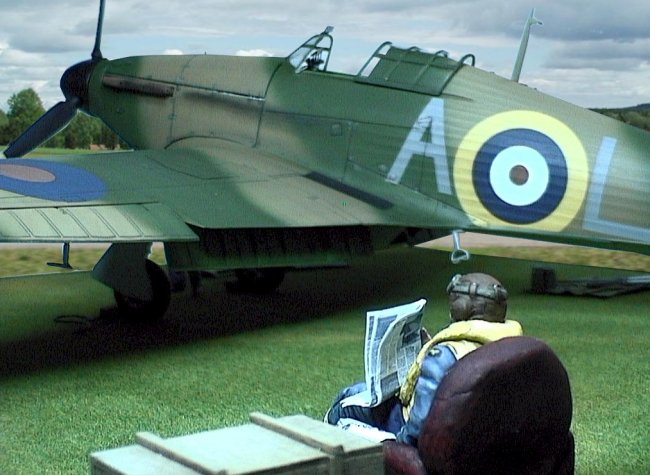
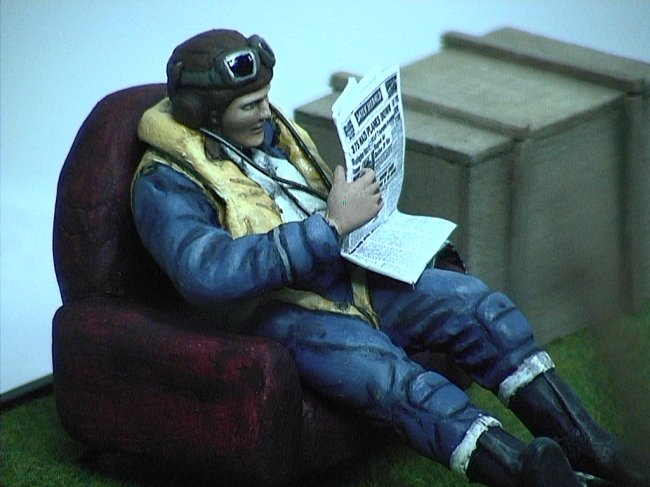
Flt. Lt. Gleed is seen sitting in the background, on a worn couch, reading the
day’s newspaper, as was usual in the RAF airfields, where pilots usually
enjoyed the outdoors while on alert and awaiting for the scramble call. I used
the Airfix 1/24 scale Hawker Hurricane Mk-1, figures from the Fujimi racing team
which were modified to become Flt. Lt Gleed and his crew chief. Additionally, I
used the Waldron Model Products British Instruments, seatbelt buckles and for
harnesses I used Verlinden lead foil.
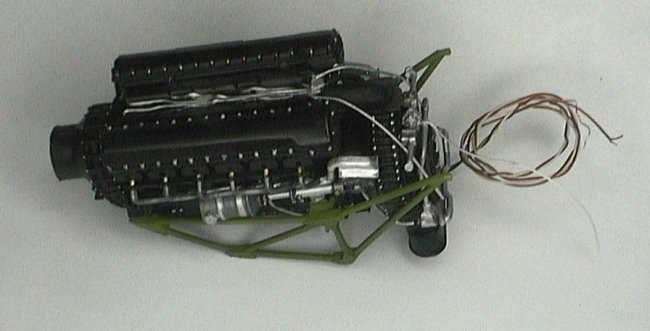
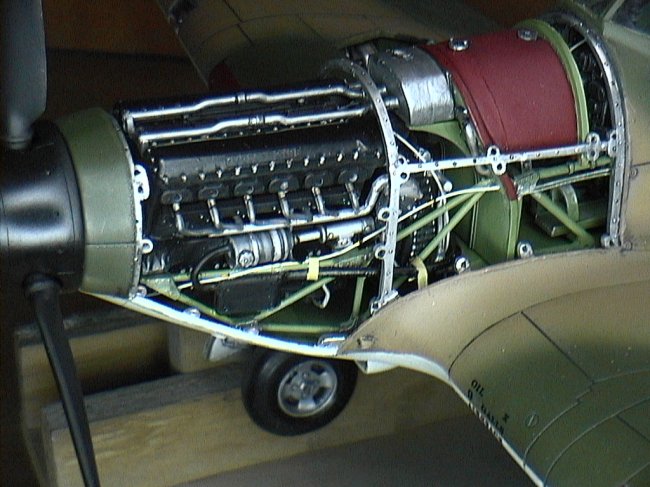
I started this model
by assembling the engine and adding lines, sprocket and chains for the
supercharger linkage, electrical boxes and wiring. I used two sizes of solder,
thin electrical wire, Evergreen plastic strips, tape and lots of inventive
thinking along some really good reference pictures I got for the Rolls Royce
engine. Before closing it I added a Mabushi type micro motor to spin the prop.
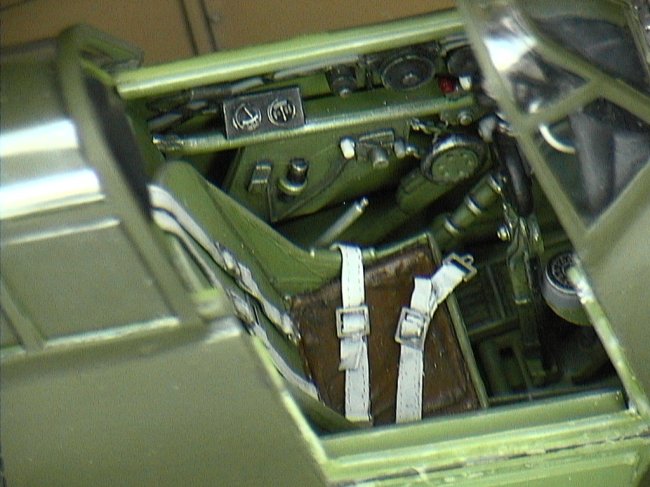
After the engine I proceeded to the cockpit. Needless to say, the Waldron
instruments were very handy in making this one a winner. I used the kit’s
panel and modified it to accept the Waldron instruments. I added scratch built
lines, wires and boxes around the cockpit as per my reference pictures. The
seatbelts were fashioned from this lead foil from Verlinden and the buckles
added from the Waldron kit. Using Tamiya Epoxy Putty, I fashioned the bucket
seat padding, as per my reference pictures and added one unusual item in the
cockpit, a cushioned headrest. Flt. Lt. Gleed had one of these installed in his
Hurricane, like some other RAF pilots of the time.
From the cockpit I
proceeded to the flaps. I carefully cut the flaps from the bottom wing and
detailed the ribs inside with thin Evergreen styrene strips. The flap wells
inside the wing were also detailed with Evergreen styrene sheet and strips. I
drilled pilot holes in the wing inside the flap wells and located the matching
pins in the flaps themselves. These serve to install the flaps to the wings in
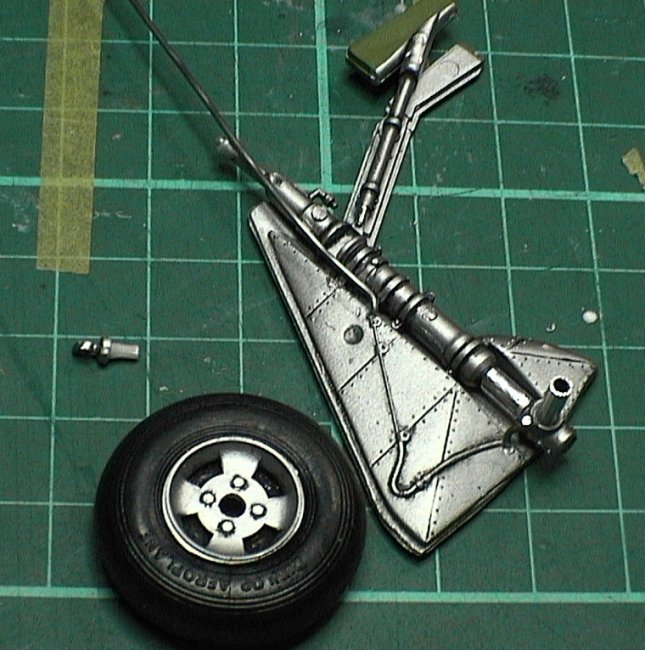
the proper angle and distance from the wing/flap well. The landing gear well was
next adding just few missing lines and wires. The main landing gear struts are
OOB with just paint and weathering applied to it. The wheel hubs, however,
needed some modifications. The pin that holds the wheel to the strut was too
weak and did not provide the strength to hold the heady model correctly. I
decided to replace it with aluminum tubing cut to size and fitted to the strut.
The original central wheel pin, which is also a detail part of the wheel hub
bearing assembly in the aircraft was cut to size and installed to the aluminum
hub. This worked well and held the heavy model correctly. The tail wheel needed
severe modifications. Again, using part of the original strut I fashioned the
rest out of aluminum tubing. This worked just fine and provided the strength to
hold the heavy plane up.
Assembling the model
was a treat. The fuselage front section was warped to the extent that I had to
use the traditional hot water treatment to bend it back to its normal shape. I
have a tradition that states that “is wise to take advantage of the
disadvantages we are presented in life”, and following this tradition, I
took advantage of the little warp left in the nose to install the engine and
engine mounts last. If you follow Airfix instructions you will install the
engine and engine mounts to the bulkhead/cockpit assembly first. This may lead
to a misaligned engine, thus disaster later. I installed the cockpit assembly
and closed the rear fuselage adding additional styrene strips to the inside of
the fuselage to reinforce the top seam. Note, the plastic in this model was
unusually soft; hence I needed to be very careful while handling it. Once the
fuselage was closed, I took advantage of the still open nose and placed the
engine in its correct angle. Said and done, had I cemented the engine and mounts
to the bulkhead before, they would have been twisted out of place. Done that, I
fitted and closed the nose and used superglue and accelerator to get the job
done. The end result was good.
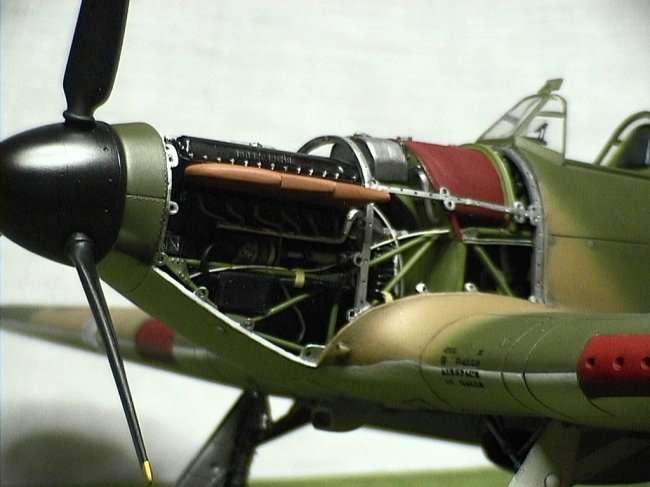
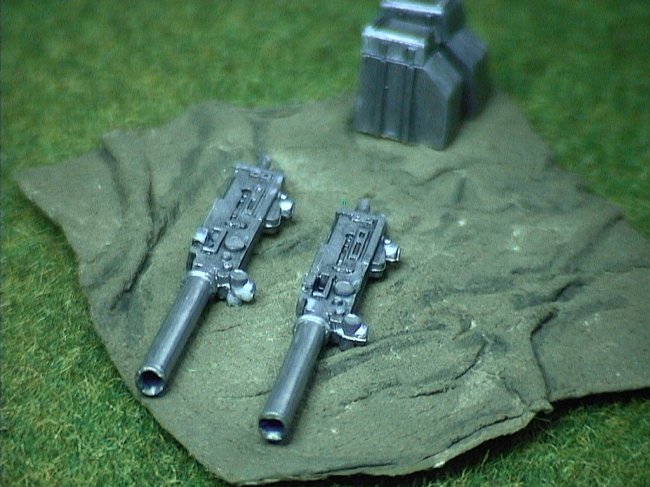
I decided to cut the
right engine cover into its two separate panels for authenticity and used this
styrene strips to detail the inner structure. The right gun bay was opened up to
show the four Browning .303in machineguns, the ammo belts and boxes. These were
very simple bays with only the electrical wiring added to the firing solenoids.
As usual, the bay was painted and weathered. The left gun bay houses the
electric motor on/off switch and the battery to spin it. The rest of the
assembly went of pretty well. Only minor filling was needed at the wing root and
the top and bottom fuselage seam.
Painting and
weathering were done next using the standard pattern. I painted the model with
enamels, starting with pre-shading all the reassessed lines and the raised
rivets, then using a little mineral spirit on a rag, clean it out to make the
rivets stand out. This works pretty well when the accumulated shading around the
rivets shows through the next thin layer of paint. Next I worked the bottom with
thinned light gray, and then the top with lightened and thinned dark tan. After
that I used lightened and thinned RAF dark green for the camouflage pattern
applied freehand with an Aztec airbrush using the thin tip. Once the colors were
set, I applied a gloss coat overall. A couple of days after it was dry, I
applied the kit’s decals. Regret to say that there is no 1/24 scale after
market decals for this kit. The kit’s decals went on pretty well. I used Micro
Scale set to soften the decal to conform to the shapes in the model surfaces.
The side lettering and roundels were a one-piece decal, and I decided to trim
off every letter and roundel and apply them separately, leaving no decal sheet
between them. This proved a wise trick, and a clean model. Airfix does include
the vertical stabilizer national insignia in two colors, blue and white only.
The modeler needs to paint the red. The instruction calls for this insignia to
cover the entire vertical stabilizer from the rudder forward. My research showed
that the insignia of the time was smaller, therefore I painted a white square
the size of the trimmed-down decal, measured and painted the red portion and
added the decal. This worked pretty well.
After the decals
were set, I used a mix of black and dark gray watercolor thinned down and with
liquid dishwasher detergent added to create what I call the Goop. Using my goop
I applied the weathering to all panel lines and rivets. I used grinded down
pastels for the exhaust and the gun ports. Once I was satisfied with the
weathering I applied two coats of clear flat to seal off the entire work and
tone down the paint to a weathered, off color camouflage.
The diorama base is
an inexpensive 16 x 20 picture frame. This one consists of glass mounted on a
black plastic frame. I glued the static grass to the glass using architectural
grass from a large sheet. The grass was then painted and weathered a bit to
include several shades of green and yellow, typical of the British airfields at
summer time.
Using the Fujimi
auto racing mechanics set, I repositioned two figures to pose for the pilot and
the crew chief. Using Tamiya Epoxy Putty I sculpted the flight suit, life
jacket, helmet and goggles on the pilot figure, and sculpted the mechanic’s
coverall. Using an acrylic base coat I primed the figures and used artists oils
to paint and detail the figures. From residual epoxy putty I fashioned the
parachute, to which later I fashioned the straps using aluminum foil. The worn
couch is from an air drying putty made in Spain, very similar to Sculpey, then
painted and weathered it. The wooden parts box next to the pilot was done from
thin Balsa strips, painted and weathered to add some detail. The final and most
attention grabbing detail items were fashioned from images found while
researching the Internet. The newspaper the pilot is reading has a headline
appropriate of the time, “175 Nazi Planes Down” referring to the Battle of
Britain. In addition to that, I added an aerial chart over the side of the
couch, another one folded in the right side cockpit pouch and another one folded
and pinched along the left side of the windshield. These items definitively
added a “touch” or “spice” to the scene.
In summary, the
Airfix model came up pretty well and made a fine example of this venerable
fighter that greatly contributed to keep the invading Germans from ever
occupying Great Britain. I must echo those profound words once spoken by the
British Prime Minister, Sir Winston Churchill,
“Never,
in the history of warfare, was so much owed by so many to so few.”
Thanks to all the
good folks that have praised my models in the past. The next projects will
include an 1/24 Spitfire diorama, a 1/24 Harrier diorama (illuminated, sound and
all the good stuff), a 1/32 F-86 diorama and a 1/32 Mig-15 diorama in the near
future.
Any comments, please
contact me at mustafa56@msn.com
George
|
|