Construction:
The construction started out one day when I decided that since I have nothing to
do when I'm finished with my homework, I should keep building models and
improving my skills, and not only working in the summer. The first step was of
course gluing the two fuselage parts together. After everything was dry, I had
to do a lot of filing and sanding to smooth out those nasty seams and remove the
sprue marks. I also had to rescribe several panel lines with my new Squadron
scriber that I bought for 10 bucks at San Antonio Hobby Shop. This was my first
time using a scriber, so the results turned out to be sloppy, but they are not
really noticeable. After that, a nice run-through of the whole fuselage with
1000 grit sandpaper was done to smooth everything out nicely.
Next came one of the worst steps of construction: wings. The wings on the
Minicraft are interlocking, so I didn't have to worry about them not being
aligned. There is minimal detail on them, but it will work for me. After the
normal gluing and sanding to smooth out the seams, I attached the wings to the
fuselage. When everything was dry, I noticed large gaps in the wing roots. Some
of the biggest I have ever seen, next to the ones on the 1/72 B-2. This took a
lot of filing and sanding session to get the joint really smooth. Then I had to
rescribe all of the panel lines by the wing root. The stabilizers also had this
problem, which was fixed later.
Before leaving on a trip to New Orleans, I tried out something that I had never
done before: detailing wheel wells. The wheel wells were bare and had absolutely
nothing. I found some pictures of the wheel wells on www.airlinercafe.com,
and used that as my reference. I found some old electronic toys that I used to
play with when I was little, so I took them apart and found some wires in there.
I took them out, cut several of them to different lengths, bent them, and glued
them on the wheel wells to represent all of the hoses and wires going
through the wheel wells. I also did the same thing with the landing gear, but
using thinner wires.
Next came the primer, which I had used for the first time. I got Tamiya Grey
Primer from the hobby shop and decided to try it out because I heard a lot about
it from the ARC Discussion Board. Unfortunately, all I did was shake the can and
spray it out, and I got a very bad texture. I didn't know that it will be
smoother when its put into a cup of warm water. I found out that I had
areas where there were blobs of primer and it was uneven compared to the rest of
the aircraft. I didn't know what to do, so I went straight to the computer and
asked on the Discussion Board. These guys are so helpful. In just 1 hour, I got
a reply from madmike telling me how to fix everything! I sanded down the areas
with the wet/dry technique and applied some more primer to the areas.
The
engines on this baby were very hard to work with. It felt like working with
intakes again. There were deep gaps by the fans, and I could barely smooth them
out after puttying. Also, I had to fill in the area between the engine and the
fans because there was a large gap. Also, there were large gaps between the
cowlings and the engine itself. And then came the trickiest part...
Painting:
I
decided to start out with masking the wings and stabilizer, and painting the
bottom blue. I have had very bad experiences with masking over white, so I
decided not to go through that again. I scanned the decals, then printed them
and used them as a masking guide for the tail and the curve below the
stabilizers. I got this great idea from Airlinercafe.com.
After that, I gave the model a nice coat of dark sea blue, which was mixed using
Tamiya 50% X-1 Black and 50% X-4 Blue. Then, I found out that I could have just
used XF-17 Sea Blue. After taking the masking tape off, I realized that some
paint went through, so I decided to be more careful with the next time I use
Tamiya masking tape. There were also some areas with paint build-up, which were
removed with wet and dry sandpaper and painted over again. Then I started
masking the blue to prepare for the white. This time, I ran my nail through the
panel lines to make sure the paint doesn't run through. Luckily enough, it
worked. But when I came to the tail, I was shocked. There was an area where the
white seeked through, and ruined the whole tail. I had to wet and dry it again
and cover in the blue.
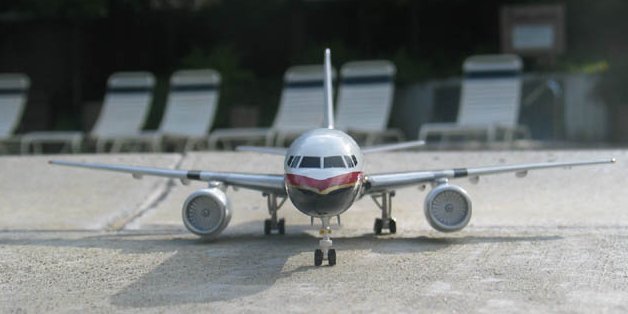
The
wings and stabilizers were first given a coat of Tamiya Sky Grey in the middle.
Then the area was masked and everything else was given a coat of light gray,
which was mixed using Tamiya Sky Grey and White. The area in front was masked
and painted with Tamiya Flat Aluminum. The same was done with the bottom.
The
engines were painted white. Then, masked on the edges, and painted Tamiya
Chrome Silver inside and on the rim. The pylons were painted with the light
gray mix. The burner cans were painted with chrome silver. Then half
was masked and painted with burnt steel, which was a mix of Tamiya 50% Flat
Aluminum, 10% Brown, and 40% Black.
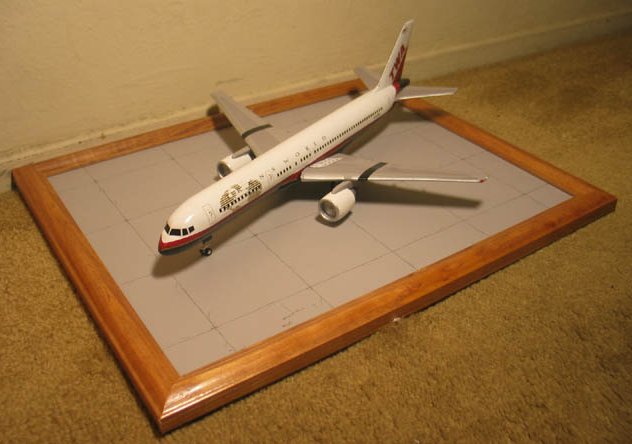
Markings:
I decided to
stick with the in-box markings that Minicraft provided. I really wanted Delta,
but then I took a close look and saw how beautiful the TWA decals were,
especially the globe in front. I started with decaling the tail, which went on
beautifully. Then I noticed that the blue paint could be seen through. The
decals were very thin, so I don't recommend using Minicraft decals anymore if
you have a painting situation like I did. Then, the decals on the main fuselage
went on. They didn't really match where the two decals met, so I had to paint
some Tamiya red on those areas. All of the decals were then covered with
SolvaSent to make it get into the panel lines and look naturally on the
aircraft. Then, I took a look at the nose and noticed that I didn't blend the
two decals that met on the nose together. It looked awful, and I couldn't do
anything to take the SolvaSent off. What I did is cut some parts of the bottom
of the decal off so it would blend in and not look crooked. Then the model was
given another coat of Future.
|
Click on
images below to see larger images
|
|

|

|

|
Final Construction:
When the
Future dried, I started working on the landing gear. I painted it white, and the
wired were silver and black, according to the aircraft. I also weathered the
wheel by rubbing some very dirty newspaper on it. I then installed the landing
gear and the doors and let it dry for the night. The gear was kept straight
while drying with a pencil placed on the wing right next to the struts. I had do
sand down the wheels to make them flat, instead of curved when its standing up.
This gave it a more natural effect.
Then,
the engines were glued onto the wings and kept straight with a pencil again. When
everything was dry the next day, I gave the landing gear a coat of Future. I also
gave the engine joints with the wing some Future, since the engine itself was
covered with Future.
Remarks:
This
was a really large project for me, since it was the first time I tried making a
model during school time. I realized that it turns out better when I work
at different times on the model, instead of working nonstop. It took me about 4
months to complete and I am really proud of it. I also experienced some new
techniques on this model like rescribing, using thinner, and scratchbuilding. I
also realized that if I airbrush Future one more time, I will go crazy because
of all the buildup at the bottom. I'm sticking to brushing it on from now on.
I must say that this model
couldn't have been made possible without the help of everyone on the ARC
Discussion Boards, and the encouragement of fellow modelers. This one is
dedicated to you guys!
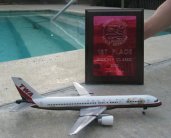
By the way, this model was
finished on Saturday, Febrauary 21st, only one day before the 11th Annual
Kickoff Classic contest here in San Jose. I entered it the next day and was
amazed to win a shiny 1st place plaque that I am very proud of. My first contest
and I get 1st place. If you have any comments or questions, feel free to email
me at dimsh2000@yahoo.com or PM on
the Discussion Board as dimsh2000.
Dmitriy
|
Click on
images below to see larger images
|
|
|

|

|