|
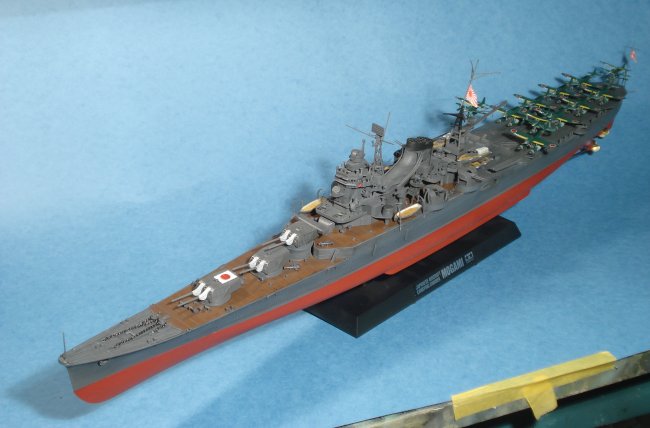
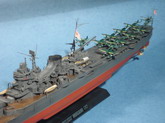
The Mogami was originally launched as a "normal" light cruiser in 1934.
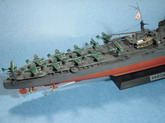
After being heavily damaged at the battle of Midway in June 1942, she was repaired, had the two rear turrets removed and refitted with a large aft
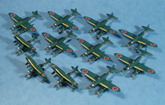
deck to carry additional aircraft. The Mogami could carry up to 11 recce aircraft, but the normal compliment was five Aichi E13A"Jake" and three
Mitsubishi F1M "Pete". There were plans to carry the newer Aichi E16A "Zuiun" but this aircraft was not developed in time. The Mogami rejoined
the fleet in June 1943 and fought at the Battle of the Philippine Sea. In late October she fought at the Battle of Leyte Gulf and was sunk the next
day in the Suriago Strait.
I have never built a ship model before and was quite reluctant until I was asked to build this particular kit. The combination of cruiser with lots
of Japanese aircraft and a Tamiya kit was irresistible. The kit is composed of typical Tamiya plastics plus a photo-etch sheet for various
ship, antenna, catapult and aircraft details and screws for assembling the main components. Metal shafts are provided for the props and a decal sheet
for the aircraft plus a paper sheet of printed flags. A stand is provided to display the ship with a full hull or you can use a flat lower hull to
make it a 'waterline' model. A 24 page instruction book is included plus a full colour two sided painting guide drawn to the same size as the model.
Click on
images below to see larger images
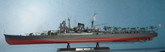
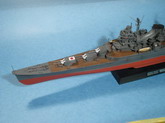
Construction begins with the cockpit... NOT, first the hull is assembled
and right away you need to decide, 'full hull" or "waterline". The lower hull is moulded in red and you could get away without painting it although
I did. For painting I used the recommended colours from the Tamiya "TS" Spray cans, decanted and sprayed through my Tamiya HG airbrush. These
paints are laquer-based and once thinned correctly are the absolute best paints to airbrush although you need to be sure to have good ventilation.
Another thing to watch is to be careful when spraying large areas as the paint will dry quickly if you spray from too far away and make a rough
finish. Detail painting was done with Tamiya acrylics. Major large parts are held with screws in addition to glue and this provides very good
alignment during the assembly and no clamping was required. The stand was attached at this time but props were left off until the final stages to
avoid damaging them. The upper deck goes together as a series of sub assemblies and this is where my lack of experience slowed me down. The
painting instructions stated "where no colour is specified, paint with hull
colour" but not knowing ships very well I missed the fact that half of the
deck of this ship was to be painted "linoleum". As a result I had already
attached lots of small detail parts that would be grey before I painted the
linoleum deck sections. It would have been better to paint the deck first,
then attach the detail parts. Other than getting the painting vs. assembly
sequence correct, everything went together perfectly. Since it was a ship
there were only two or three "seams" to clean up and the fit was perfect throughout.
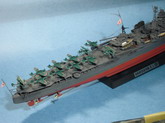
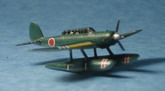
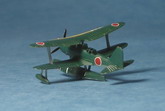
I saved the aircraft until the end and I'm glad I did. I airbrushed the
main colours free-hand using Tamiya acrylics very thin and 18 psi on the airbrush. I applied the decals assembly-line style; all upper wing decals,
then all lower wing decals, etc. wetting up to six decals at a time. There are decals for the wing ID stripes and the floats. The canopies are also
decals, with the windows in black and the frames in clear. There are 17 decals per aircraft, multiply that by 14 planes and there were 238 decals
compared to only one for the ship itself! By using Mr. Mark Softer, careful alignment and patience the result is quite good. Then they were assembled,
each plane consisted of one fuselage part, one or two wings, one or two floats, one horizontal tail and a photo-etch prop with a plastic spinner.
In the end it took over 12 hours to paint, assemble and decal the 14 aircraft provided. Each plane but one "Pete" is then attached to a two-part
photo etch catapult trolley and then attached in any fashion you want to the ship's deck and/or catapults. Final assemble included adding the
delicate antenna, props and flags. A very light wash of dark grey oil paint was applied to the corners etc. The white covers for the guns were painted
a mixed white/tan/grey combination. Total building time was over 120 hours over 4 months. The kit is amazing and just confirms Tamiya's outstanding
attention to engineering and fit.
Bill Bunting
Click on
images below to see larger images
|
|