|
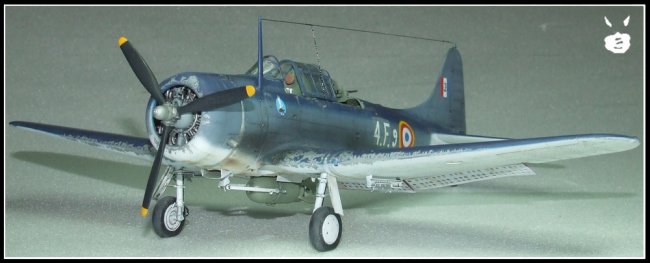
French navy, Escadrille 4F,
Indochine 1947
Back with my favorite theme: Non
French aircraft with French markings, with this legendary Slow But Deadly Navy
dive bomber. The Italeri kit is a re-issue of the Classic Airframes kit, which is
a very good kit except the airbrakes that are too small.
For French readers, you can read
this in French on the Fighter forum here: http://fighters.forumactif.com/vos-montages-avions-helicos-f2/italeri-sbd-5-dauntless-t30138.htm
For all the others, so the vast
majority here, happy to share with you these mounting steps.
I think the content of this kit is
well known and has been repetitively shown, just one remark: the instruction
sheet of the classic airframe kit is much better, you can find it on the net
here: http://www.accurate-miniatures.com/instructions/SBD-5_3412.pdf
01: Few thinks added in the cockpit
which looks quite full, just some few cables.
02: Seat has been fined.
03: Cockpit is painted and weathered
in a very classic way: interior green + juice + white drybrush. I took benefit
of that time to cut rear stabilizers and position them to give some life to the
kit.
04: seats belts are furnished as
decals. I did put them on aluminum tape and then cut them.
Click on
images below to see larger images
06:
Rear cockpit has been scratched to obtain the correct equipment. I did not use
the instruments decals and preferred to paint them
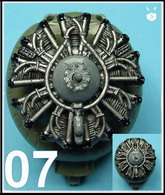
07:
Nothing to do on the engine except paint it
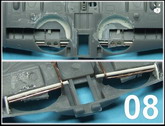
08:
Some few details added in the wheel bay. Note also that the radius is too small,
I did correct it using putty.
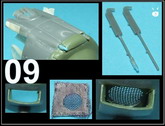
09:
Guns: I did replace the extremities by electric wire. I did not used the kit
part for the oil radiator to create my own with a piece of curtain tissue
10:
Putty was used and smoothed with acetone.
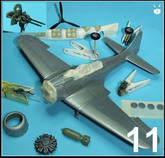
11:
At this stage the kit is quite completely build and hand painted with Humbrol 11
aluminium for future weathering. Rear machine gun have been a little bit
enhanced with their visors.
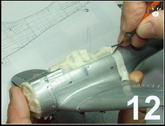
12-13:
But at this stage I decided to create all the rivets on the airplane which are
quite visible as you can see on this picture: http://www.airliners.net/photo/France---Navy/Douglas-SBD-5-Dauntless/0784659/L/
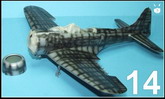
14:
Then paint process is classic: First brush black paint on the structure lines
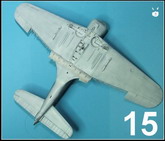
15:
Bottom is painted in flat white
16:
Upper surfaces in Humbrol 144 and Tamiya X3
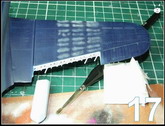
17:
For upper surfaces, I did continue the weathering using pastel powder: on the
left zone, not applied, in the center zone, during application, in the right
zone, once cleaned.
18:
Then I scrapped the paint to show the Humbrol 11
19:
A dark juice is applied on the intrados : left zone: finished, center zone: not
applied, right zone: during application
20:
same thing on the intermediate blue
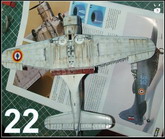
21:
Whereas a light grey juice is applied on the dark blue painted zones.
22:
Intrados surfaces are weathered with a brown color. I have a picture of a French
Dauntless which central intrados zone is quite black.
23:
Exhaust traces are usually soft on Dauntless, I did them using Tamiya smoke.
The same photo in black and white, in real, I did paint 3 times the exhaust
traces before arriving to a result that did satisfied me, the black and white
photo allowing me to make a comparison.
24:
Real wheel is to be scratched, the one of the kit is not correct for this type.
Extrado airbrakes are really too short, perform the modification before painting
if possible.
This
is it, a last flat varnish and this typical Slow But Deadly aircraft is
complete.
Hope
you enjoy, and as I send this mail to Steve on Dec. 24th, with a
little bit of delay, happy Christmas and happy new year to all of you.
Laurent ‘Angus’
Beauvais
Click on
images below to see larger images
|