|
This kit seems to
cop a bit of flak and I'm sure I don't know why - apart from some semi-serious
filling and sanding at the underside wing/cowl joint, this thing fairly fell
together.
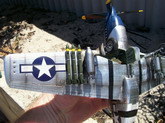
This is my first
attempt at opening some panels- the kit comes with a removeable engine cowl and
some pretty basic gun bays that suggest the scalpel.
Click on
images below to see larger images
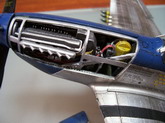
Also thought I'd try
my hand at some wiring with mixed results- the engine bay leaves a lot to be
desired and detracts from the overall finish- its a learning curve I guess. The
gun bay was modified by drilling some holes, adding a centre separator with some
evergreen, some boxy bits around the guns and a bit of wiring that works
well.
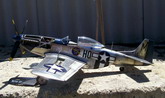
The finish is alfoil
using the panel-by-panel method. Differences in hue is achieved by
pre-rubbing sheets of foil with various grits and sanding directions. Some
were also discoloured by boiling foil with some egg shells- its quite random and
highly effective, especially for burnt/heat affected areas. Painted sections such
as the blue nose and rudder, wing and invasion stripes were done first then
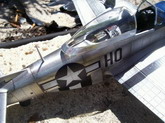
masked so that the foil could be run up to the tape edge and trimmed. Next came
'future' - essential really as it is the only thing that seems to grab to the
alfoil - followed by decals which were pin-pricked at the rivets; as was the
whole aircraft (rivets were pre-drilled a bit). Bit of a wash in the panel lines
before a coat of matt clear. Matt finishes take post-shade a bit better because
of their propensity to soak up rather than run the shading material- in
this case, very heavily thinned black and some Tamiya smoke. Bit of pastel dust
here and there, a coat of satin to seal the deal and, voila.......hope you
like the pics
Mike Pattison
Click on
images below to see larger images
|