|
So the F-22 has been
in service for a couple of years now, but as I'd be the first to admit I don't
know too much about this bird. Well that is other than it's a ludicrously expensive, technologically extravagant piece of military hardware that's one of
the coolest airshow performers I've ever seen. Now there is a lot of things this
jet has going for it, but pritty it ain't. Not in a million years I can see
this as a nice looking aircraft. The P-51, F-16, F-5, SU-27 and Mirage jets to
mention but a few has a certain look and personality to them. But this
thing.. your not even supposed to see it.. Still I've seen it perform at airshow
a couple of times and considering the size of this thing, watching it move and
almost tie a knot on itself is really spectacular.
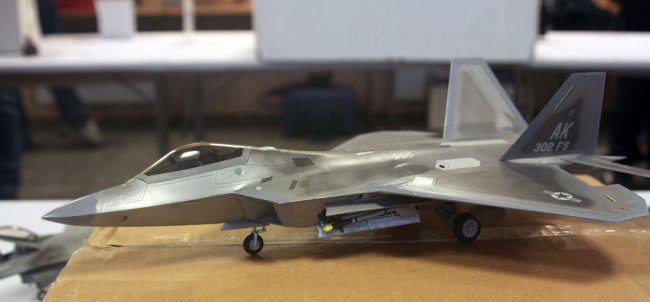
Over to the build. This model is the Hasegawa offering. I found it on
Ebay at a substantial discount, 30 US Bucks + 10 $ shipping to Norway.. I can't
really complaint about that. So I grabbed me a couple and when they
found their way to my post office I was a happy camper. Now what I'd been
contemplating is how the heck to paint this jet. I know from seeing it at both
Nellis and Oceana, and not to mention about a million pics I've seen of the F-22
I know getting the paint right would cause some sleepless nights. I've
seen many F-22 builds where the modeller has just painted it in standard USAF
colors much similar to that of the F-15C/D, but it does not look right, and it's
not. So time to hit the message boards, and after a couple of hours
discussion I got some tips. Most of them I could not use cause most of the
paints suggested is not available to me here in Norway. Then one was
to use something called "raptor sceen", as produced by hawkeye's.
Not a bad idea.. I went on to the website and ordered a couple of bottles..
About an hour later I got an email informing me that my order was canceled and I
was given a full refund.. why ?!?! USPS would not ship it.. come'on gimme a
break.. He could ship it to me FedEX.. for A HUNDRED AND FIVE DOLLARS...
your kiddin' me right ?.. Nope he wasn't kiddin' so I just let that one go...
Now I thought I was
kinda' screwed. then I got another tip. Citadel/Games Workshop, and the guy
even included a recipe. I haven't considered Citadel before, but I headed down to
the nearest Games Workshop vendor in Oslo and yea, he had all of the colors I
needed. "Chaos Black, Boltmetal Gray,Cainmail metal and Codex gray.
Click on
images below to see larger images
With a possible solution to the paint issue, now to build the
damn thing... Now I usually don't need to follow the instructions, but in this
case I would never have been able to build it without it. It looks to me as
Hasegawa has gone through great lengths to make this as complicated with as many
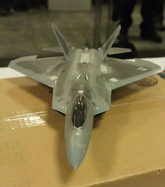
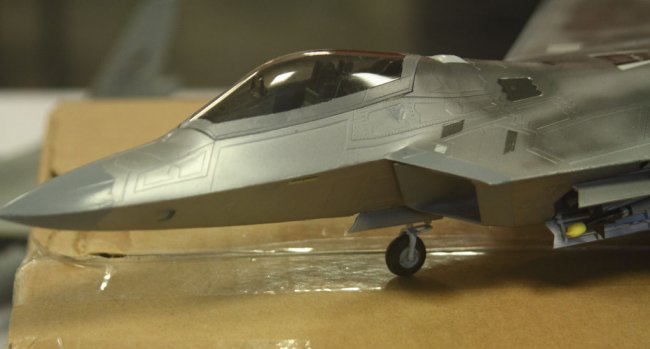
parts as possible, however the parts fit is good and construction is relatively
painless. Very little filler if any is needed, but you really need to pay
attention, especially when assembling the landing gear. Also when joining the
upper and lower fuselage you need to be very careful as the fit is very exact
and there is little or none margin for error.
Now back to the paint, I followed the instructions I got wich is
as follows.
- Light metallic grey: Chainmail + Codex Grey. Approximately 3
parts to 1 part.
- Dark metallic grey: Boltgun Metal + Codex Grey. Similar sort of ratio, plus a
few drops of Chaos Black
I did the mixing and thinning it with water
and a drop of alcohol I loaded up my airbrush and went to work, It sprays
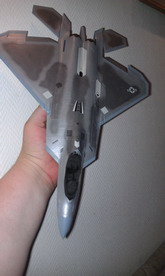
lovely. The model was primed with Tamiya primer and the Citadel colors went on
and sticks like glue. Now the Raptors look fairly clean to me, so I decided to go
very lightly on both shading and weathering. I chose to use my 0.2 MM airbrush
nozzle and the camo patterns was freehanded on. When done I was astonished on
how good it looked. I let it dry overnight and decided on using a couple of
layers of satin varnish as a base for the decals. But before the decals I had to
mask off all the leading edges of the wings, tailplanes and elevators plus the
radome for the gray. I mixed this from xtracryllics acryllic paint and sprayed it
on. another couple of layers of satin and now it's time for the decals
Now the d ecals
sheet included in the kit is
extensive and it took a couple of nights work to get them where I wanted. This
is the only part of the build I didn't like. Some of the "panels" is a
real PITA to get to sit just right. But when I was satisfied I applied Mr
Microsol and let it dry for a few days. After another coat of Vallejo satin
varnish and some very localised and light washes I sat back and looked at what
had turned out very nice. I'd never expect to get the result I did and if I
might be so honest I'm very happy with how it turned out.
The kit is very nice and has some gr eat detail to
it, but be prepared for alot of fiddly small parts.
Life on the line
continues
Sten-Arne B Brunsby
|
|