|
History:
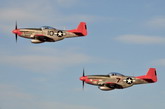
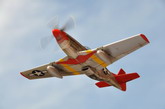
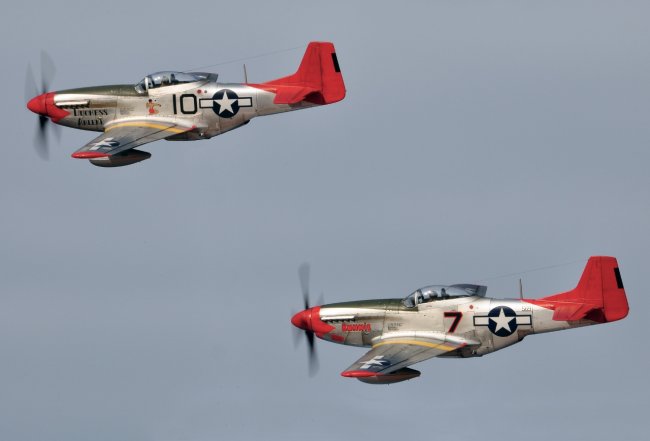
On 31 March 1945, 46 Mustangs of the 332nd Fighter Group based in Ramitelli, southern Italy, undertook a sweep of the Munich area obtaining the destruction of seven locomotives and 16 enemy fighters.
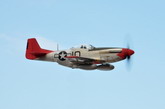
During that mission, two pilots of the 100th Fighter Squadron shot down three Fw 190s: Capt. Roscoe C. Brown on
"Bunnie / Miss Kentucky State" claimed one, while Lt. Robert Williams on "Duchess Arlene" was credited with two.
Planning & Construction:
For this project I used the ICM and Tamiya kits.
In the beginning, my goal was to build a plain-Jane natural metal P-51 to try the kitchen foil technique that I had been testing on scrap models for some time with encouraging results, but then this project evolved in an unexpected way.
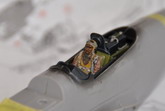
I began building the ICM Mustang starting as usual from the cockpit but despite things were going rather well, somehow I lost interest it.
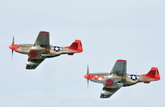
That's until I bought the Tamiya P-51 "Tuskegee Airmen" box some time later: I was intrigued to see that I could build two fighters of this glorious squadron wearing one of the most striking liveries ever. I was even more surprised to discover on the Osprey book "Mustang Aces of the 9th & 15th Air Forces & the RAF" that those two fighters flew together in a
successful mission.
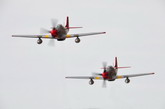
My interest was again wide awake and I was already making plans to portray the two P-51s in a small diorama preparing for their mission over Munich, when I stumbled upon an article by Roberto Masukawa here on ARC about a E2-C Hawkeye with motorized props. Cell phone Vibracall engines...What a neat idea Roberto!
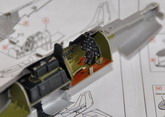
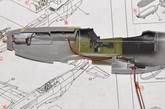
I was lucky to have two old mobiles at home willing to donate their vibracalls to the cause and one hour later I had my two engines ready for use.
I prolonged the engine shaft with brass tubing and connected it to the spinner plate. Then I mated the engine/spinner plate group to the fuselage, doing it with the engine running to let me adjust the positioning until I achieved the right centering.
One tricky step of the process, though, was to remove the tiny engine shaft from the off-center weight that produces the vibration in the mobile: this weight is very firmly fixed to the shaft and somehow I bent it in one of the engines. This is not a big problem if you plan to build your model "gear down", but it becomes of paramount importance in case of an "in flight" bird.
Indeed, I learned it the hard way because at some point I changed my mind and opted for an in-flight diorama: once I had both models finished and installed on their stand, I discovered with horror that the
slightly bent prop shaft on
"Bunnie" made her to vibrate like mad on her support and that forced me to painful hours of tweaking (and cursing) of the prop assembly trying to get rid of that vibration. I wasn't 100% successful as a slight buffeting is still noticeable, but I couldn't do more without losing my mental sanity.
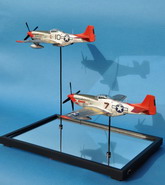
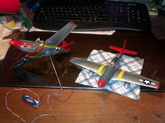
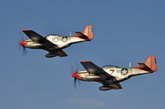
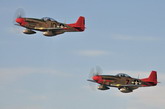
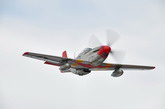
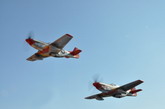
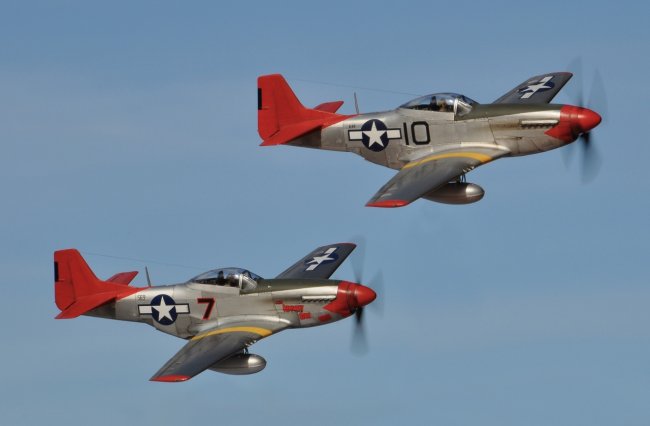
I would have surely saved myself lots of extra work with a more traditional diorama, but I thought that trying to catch the beautiful sight of two Mustangs flying in close formation was a challenge that couldn't be turned down.
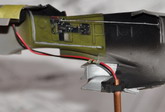
To install the models onto the stand I chose a 3mm
dia. copper tube, which is wide enough to receive the thin wires leading to the 1.5V AA battery to be placed under the stand.
Copper is soft enough to be threaded without much problems with a thread cutter.
I glued a nut of the right diameter with cyanoacrilate behind the coolant radiator to receive the threaded tube.
Apart from these modifications, the construction of the models was pretty straightforward.
The Tamiya kit builds almost by itself (my only gripe is the two-parts bubble canopy), while the ICM P-51 is basically a cheaper clone of the Tamiya Mustang.
The overall quality is inferior (soft plastic, some flash and other deformities to deal with especially on small parts, clear parts not SO clear and unpromising looking decals).
You get what you pay for, I guess, though this box (representing Pierce McKennon's "Ridge Runner") comes with a set of nicely done crew and pilot figures that surely adds value to the offering.
|
Click on
images below to see larger images
|
|
|
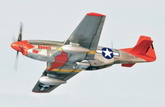
Painting & Markings:
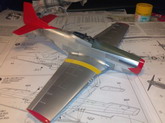
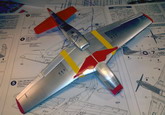
For the natural metal finish, I tried to replicate how the real NMF Mustangs were made: I used kitchen foil on the fuselage, flaps, ailerons and tail planes while the wings were puttied and sanded smooth and then sprayed with Alclad
Aluminium.
Honestly, only "Duchess Arlene" (the ICM P-51) has the fuselage completely foiled and it shows it in those parts where it is more difficult to burnish down and conform the kitchen foil without breaking it (e.g. wing root leading and trailing edges panels).
Many touch ups with Alclad were necessary there. So, for
"Bunnie" I took a shortcut and cheated a bit spraying those hard spots with
Alclad.
To add some variations to the metal sheen, I wet sanded with fine grit sandpaper some foiled panels while I used boiled pieces of kitchen foil to simulate burnt metal parts like the panels around the exhausts (which were actually made of stainless steel).
Then I handbrushed a coat of Future to seal everything and to prepare the models for markings and decals.
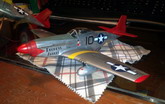
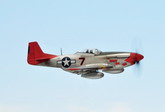
I masked and sprayed the anti-glare panel with decanted Tamiya AS-6 Olive Drab from the rattle can.
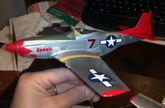
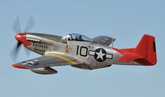
Same process for the red markings (nose, tail, wingtips and gear doors) using Tamiya TS-49 Bright Red which, luckily, is a PERFECT match for the red decal lettering of
"Bunnie". The yellow bands where masked and sprayed with Gunze Yellow H329.
Decals were from the box and the set of stars and bars and some stenciling for the second bird came from the spares.
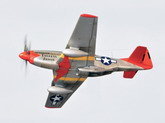
Tuskegee ground crews took great pride in keeping their Mustangs in pristine conditions: planes were regularly cleaned with water and soap and then polished with wax.
Though, I doubt that the Red Tail Mustangs always looked like brand new cars in a showroom, especially with a war going on and in a base like Ramitelli that was nothing more than a dusty (or muddy) airstrip and some field tents.
So I indulged in some weathering consisting of a wash with black and burnt sienna oils, followed by a light post shading with the same mixture plus a couple of drops of Humbrol
Dullcote. I also added exhausts and gun soot stains and assorted streaks of grime with airbrush and Tamiya Weathering Master sets and handbrushed lubricant and fluid leaks with dark oils.
A final protective light coat of decanted Vallejo Acrylic Satin Varnish completed the paintjob.
Small touch ups with Vallejo Matte Varnish were lightly airbrushed over stained areas for added realism.
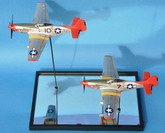
For the base stand, I used a cheap as dirt plastic picture frame into which I carved a small slot to house a on/off switch for the props.
I replaced the glass of the frame with a piece of plastic safety mirror that I bought in a local DIY chain and I fixed it to the frame with small plastic wedges and hot glue.
The copper tubes were inserted in two holes I drilled in the mirror and then bolted down with a nut, but I also drowned the joint in a blob of hot glue for good measure.
Conclusion:
This is a project that I've enjoyed thoroughly, including the struggle with the technical challenges that the build posed.
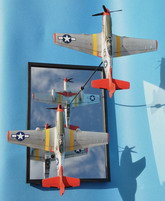
I admit this is an ingenuous attempt to represent an iconic aircraft in its natural element and a bit of this ingenuity is kindly requested to the observer to erase, at least in his mind, those two ugly poles from his sight.
In regard to this aspect, a clear sky and the "Clone" tool in Photoshop worked like magic!
Any comment, be it positive or negative, is always very welcome.
All the best,
Lorenzo Cassinadri
|
Click on
images below to see larger images
|
|
|
|