|
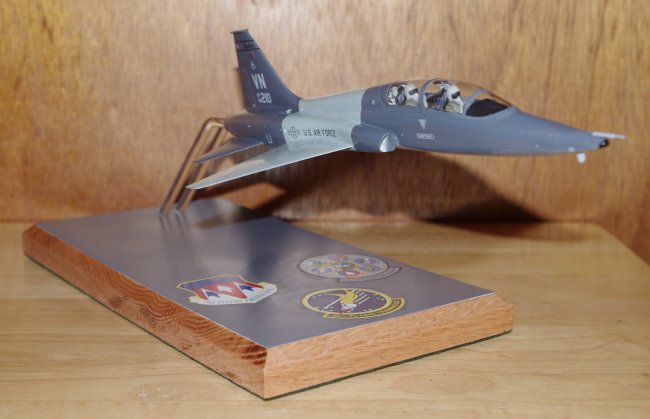
One of my latest commissions was a T-38 for a friend of mine. Whilst stationed at Vance AFB, we was an instructor in the
Talon. A lot has been written on the T-38, so I'll not reinvent the wheel. One cool note with this aircraft though. His was the first T-38 at Vance to be painted in the two toned gray scheme.
|
Click on
images below to see larger images
|
|
|
This project began about a year before construction started, mainly because my friend was sent to Afghanistan to assist in their training. I used that year to gather resources and formulate plots. I went hunting the Sword T-38, since that was the only game in town. A another friend of mine just happened to have a Sword T-38 in his stash that he was willing to part with. I got it and
yep, a couple of months later, the full plastic versions came out. GRRRRRR!
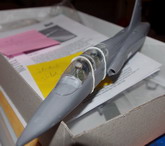
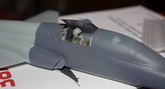
Actual construction started with the cockpit (or course) and I must say I was impressed with those resin parts. Now, I must admit, this was my first 1/48 kit in over a decade, so my
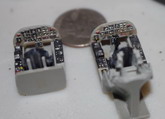
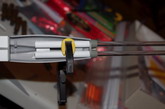
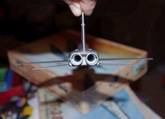
judgment may be a bit off. The castings were finely done with no missing parts or bubbles. One request by my friend was to make the cockpit "dusty". He remembered that here in windy Oklahoma, the cockpit was always dirty. After the cockpit was all finished, I started to see about how to get the pilots in there. Lets just say both pilots had the same medical condition.... To-large-leg-itis. After a fair amount of trimming, the SP and IP looked right at home. The next issue? How to make supports in the plane to hold the plane in the air. I've done this before, and I used the same basic process. I was able to glue the fuselage halves together and then work on the supports unimpeded because the bottom of the fuselage was a separate piece. I cut pipe whose ID was the same as the clear rod OD and glued them into the fuselage and then made bulkheads to keep the pipes from wobbling. The supports ended up much sturdier than I imagined. After all that, it was time to attach the
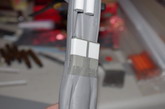
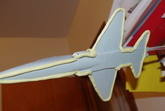
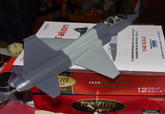
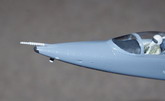
flight surfaces and MLG well. I started with the MLG well and since this was a wheels up model, it was quite simple. I really did hate covering up all that awesome well detail. One issue I had was the kit was designed to be wheels down. The doors wouldn't work, they were WAY too thick. So, I crafted my own doors. After copious amounts of superglue to fill the gaps and smooth things out, the bottom of the fuselage was looking great. Next came the wings and horizontal stabs. They glued on without any issue, no fillers necessary. By this time, there weren't many parts left. I made the 4 piece canopy into a one piece by gluing one piece on each night and letting the pieces get set up each day. I've seen the talk about the canopy with the Sword kit and while there were issues, I didn't think they were that severe. After the canopy was attached, it was off to the paint arena.
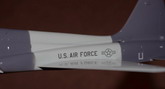
First was a coating of Micro-gel on the canopy to keep it clear. That stuff works well. I like it! I first went with the lighter grey, only around the mid-section. After a few days of drying, I got out the yellow putty and masked off for the darker grey. I blew that and after more days of drying, I applied future to have a nice smooth surface for decaling. I had gone and hunted down the Caracal decals, since they had the Vance AFB markings. I started with the tail and since the set had many, many numbers, I didn't have to go custom to get the right tail number. I then worked my way forward. To seal the decals, I coated the T-38 in future again. This also gave it that nice glossy look.

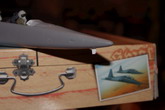
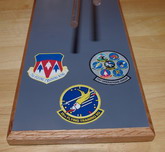
The base was the next to get tackled. My friend requested that the base be the same color as the plane and have the squadron, group, and wing markings. I went out and found pictures of them on the internet and proceeded to make a set of decals. The base is a piece of walnut with sheet plastic glued on top. Before the plastic was attached, I drilled the holes for the clear rods. Nothing fancy, just a couple of parallel holes. I did the tilting with the other end of the rods. The plastic was then airbrushed and after drying,
futured. Since I had printed the decals on white paper, I had to make sure I cut them out exactly around the edges. I had a bit of an issue with the colors coming off the paper, but I think that was all user error. I put the decals on, painted the edges, and sealed everything with a good coat of future.
That seems to be it, hope you all like it.
Thanks for looking and don't throw rotten tomatoes!
Douglas Conrady
|
Click on
images below to see larger images
|
|
|
|