|
Once in a while, a
tool comes along that really makes your life easier, especially when it helps
you out with a task that you're not particularly fond of. For many years,
I had a sort of aversion to using photoetch parts, just for the simple fact that
they can be difficult to work with. Granted, they do add a new dimension
to modeling, but sometimes, trying to bend a flat, small piece of metal into
complex, convoluted shapes can be a nightmare.
This is particularly
true with small parts. Recently, I was working on some of the Flightpath
photoetch parts for my A-10 project, and some of these parts are REALLY
tiny. Not wanting to lose any of these delicate parts, I had them taped
down to my workbench while trying to bend them with a knife blade and a metal
straightedge. The results of these parts was rewarding in terms of the
detail that they added, but it was also nerve wracking trying not to lose any of
them in the process!
As things happen, I
went out to the mailbox the same day, and what do I find, but a "Hold
and Fold"
photoetch tool. Being very anxious to try it out, I opened the box and
headed back to the cellar. The results were outstanding. I could now
shape small parts with ease, and the toolhead kept everything in place without
any fear of losing parts. Even really small parts were no problem to
shape. The toolhead has a number of smaller areas on the reverse side
which allow you to get into really tight spots to bend small parts, which worked
out great.
 |
|
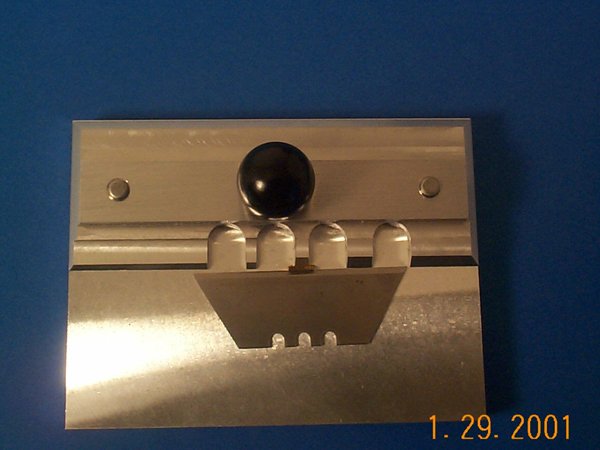
The toolhead can be reversed to accommodate
tiny parts. |
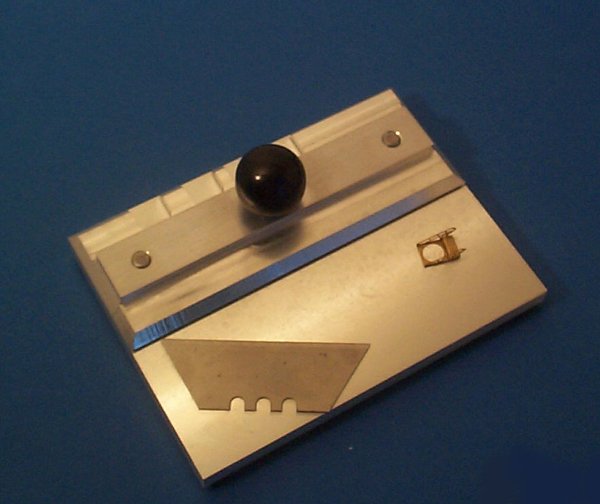
Basically, it works
like this: the toolhead screws down over the part to be bent, and locks it
in place on top of the 'table' area of the tool (which is a minutely grooved,
non-skid surface). The supplied razor is then slid underneath the part and
bent to the desired angle. When you're done, unscrew the toolhead, and
remove the part - that's it. It's that simple. I've been testing
this tool for several weeks now, and I haven't found a photoetch part yet that
couldn't be easily manipulated by the "Hold and Fold".
 |
|
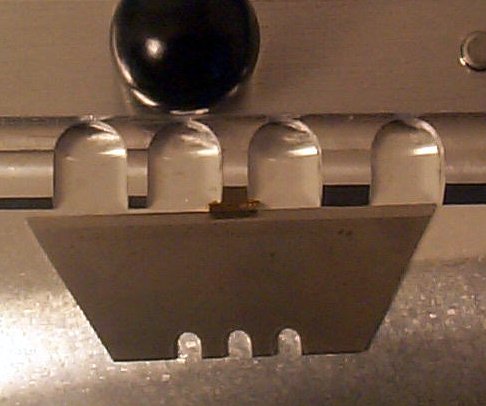
A close-up of the toolhead. |
If you have any
problems working with photoetch, I highly recommend this tool - to me, the "Hold
and Fold" is to photoetch what liquid cement was to styrene kits years ago. I
just can't say enough about it, and has really turned me around in terms of my
former aversion to etched parts. The only downside at all is that the tool
is a little expensive, but this is the type of tool that you'll only have to buy
once - it's construction is very sturdy, and should last you through several
lifetimes of modeling!
 |
|
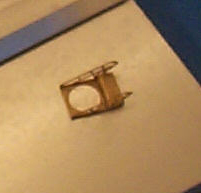
A ten second job with "Hold
and Fold"! The Flightpath 1/48 A-10 HUD. |
I'd like to
sincerely thank The Small Shop for providing this review sample, and I encourage
you to visit their site by clicking on their link below. Their mailing address
is:
Kalama Precision Machine is The Small Shop
PO Box 580
Kalama WA 98625
Phone: 360-673-1255
--------------------------------------
Comments about the "Hold and Fold" from
Steve
Bamford
Well, I must admit to being quite
impressed by quality of this tool. It's is made from machined aluminum and
it's plain to see the creator and manufacturer of this tool has a very good
understanding of machining metal. The edges are VERY crisp...almost sharp
and this produces a level of exactness that all modellers crave. I have
done my fair share of Photo Etched and I've always be disappointed by not
bending parts where I wanted to as well and the bends being less than sharp or
square. Then the final insult is for the part to launch itself across the
room to be lost in the carpet forever. I had heard of the "Hold
and Fold", but I had serious doubts.....obviously it can't be as good
and useful as everyone says.......well darn it all.....it actually is as good
and as necessary as everyone says....probably more so. One feature that
grabbed my attention is a spring that's installed under the top plate.
After you bend your PE part....you unscrew the knob on top and the top plate is
gently lifted by the spring to carefully reveal your freshly folded part.
Without this spring, you'd be struggling to lift this plate to remove your part
without your part landing in the carpet below your modelling desk. But
this spring saves you all that grief and is a perfect example of the attention
to detail and thought that went into this tool. The all metal construction
means this tool will last much much longer than me.....even the knob on
top....although not metal...does have a brass sleeve inside to make sure the
threads inside the knob don't stress and crumble over time with use. This
is a very high quality tool and a must for anyone that's serious about using
Photo Etched parts to dress up their latest kit.
You will also find a couple of
complimentary products for working with Photo Etched parts at The Small Shop
website.
Steve Filak, Sr.
|