|
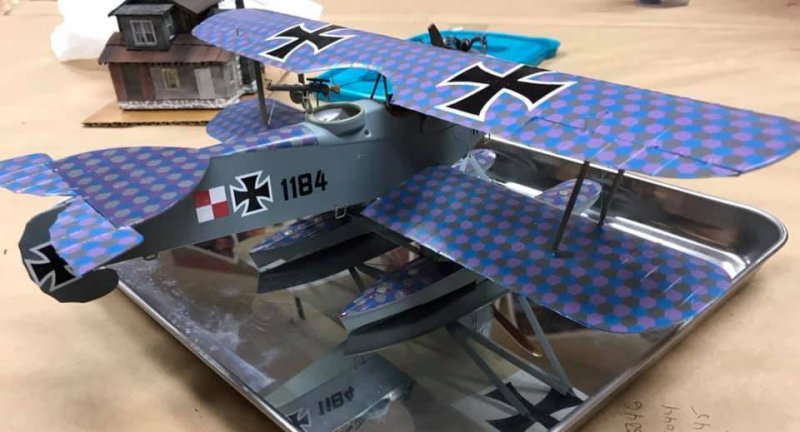
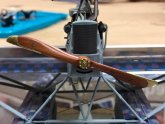
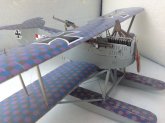
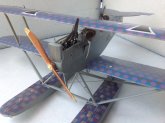
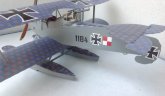
Float planes are just cool. No two ways about it, I like building the ungainly looking airplanes with pontoons. Hansa-Brandenburg produced a variety of airplanes during the First World War, primarily for use by Austria Hungary. However, they also built a series of float planes for the German Navy. One of the more successful designs, and the forerunner to the highly successful W.29, was the H-B W.12. Undergoing a number of modifications during its production run of 146, the W.12 seaplane was used as a fighter that could battle the larger RNAS flying boats over the North Sea. The plane was armed with either 1 or 2 forward firing synchronized machine guns and a flexible mount machine gun for the observer/gunner. The Red/White checkerboard was a personal marking on a plane attached to the Zebrugge Naval Air Station.
|
Click on
images below to see larger images
|
|
|
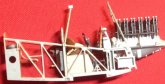
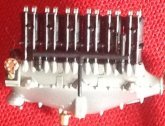
Wingnut Wings produced both the W.29 and the W.12 kits in 1/32 scale. The W.12 is a simple kit to build, since its design allowed for no rigging. Want to do a Great War biplane but don't want to do rigging? This is the kit for you. The sturdy bracing for the 2 floats was incorporated into the design so that it also provided added strength for the large lower wings. No rigging was needed. When building a biplane, you really need to do a lot of the painting before the top wing is applied. I usually airbrush the fuselage after the bottom wing is applied. When I add the top wing, it has already had the rigging holes drilled, been airbrushed (top and bottom) and in many cases had its decals applied. The control horns that attach the rigging from the ailerons to the main wing structure should be painted and applied before any decals that surround them.
On the W.12 I followed the instructions and the kit fit together like a charm. I also pretty much followed the painting suggestions, substituting Model Master enamels for the suggested Tamiya colors. The naval lozenge decals came with the kit.

I decided to list some suggestions on how to build a WNW kit since I now have a few under my belt. 1). To begin with, the tolerances are extremely tight. There should be no paint where the surfaces are to be glued together. The parts don't always click together, but the fit is precise and you must make sure the parts are flush with each other. When it comes to the struts and cabanes, they must be firmly and completely inserted into the insertion holes. 2). Before beginning a build, go to the WNW web page and check to see if there are any updates/corrections for the kit you are building. While there usually aren't any, when there are it will save you some time trying to figure out why things aren't working out. There are also great reference photos on the web page that can help with markings, rigging, etc. 3). If there is a Datafile on your airplane, buy it. It just helps so much on rigging, markings, camouflage schemes and the like. 4). Ailerons, rudders and elevators. These are all nicely done on the kits, with the hinges designed so that there is a space between 2 hinges that the 3rd hinge fits neatly into. The problem is that I can never get them to stay glued together. So, I finally gave in and started to drill a receiving hole into the space between the 2 hinges and cut off the 3rd, replacing it with a piece of firm wire glued into the aileron, etc. I then super glued the wire into the hole and a firm fit is the result. To do this, you will need a small drill and bit, but if you are doing any planes with rigging, you probably already have these on hand.
4). While you won't need to worry about it on this kit, I find the WNW landing gear to be wobbly. They are scale correct, and look good, but they don't usually form a very sturdy base for a large plane to rest on. One route is to use the aftermarket metal replacement legs. I have't tried them yet. The route I am taking is to substitute rigging thread with metal wire. You use the same attachment points on the legs and fuselage, just connect the holes with wire instead of thread, EZLine, elastic thread, etc. 5). Experiment with different types of rigging techniques on other less expensive kits before deciding on what style suits your skill level. You don't want to experiment on an expensive WNW kit. I just finished an Ansaldo SVA in 1/48 (the old Artiplast kit...a real dog) where I used EZ Line for the first time. It takes some getting used to and I am still not sure if I will use it on my next WNW build, preferring my standard silver thread system. 6). Buy an egg of Silly Putty. This is a child's toy that costs about $1.00 US. It can be found at most discount stores, candy counters and toy stores. It is an easy to use substances that can be used to fill the reception holes during painting. This may seem like overkill, but those tolerances are really tight and paint getting in the holes can screw things up. Silly Putty is also a pretty good masking agent for camouflage schemes. I also use it to fill up canopies if I am spraying them off the model. The stuff is reusable after painting and usually won't leave any residue on a painted surface. (Note the word usually. Sometimes it does and I can't figure out why). 7). What about aftermarket stuff? To start with, you absolutely don't need any to build a complete, attractive and eye catching build. However if you love adding things on, Gaspatch Models has some great looking machine guns. I used one on my WNW Eindecker build. Turnbuckles are also out there. I tried using them once and can't get the knack of it. WNW claims in their instructions that there is no need for turnbuckles. However, I have seen some builds that use them, and when done by someone who knows what they are doing, look impressive. 8). What about decals? Ah, here is where I like to go hog wild. To start with WNW provides decals for 5 markings in each kit. There is usually a pretty good selection to choose from, but I sometimes want to do a different scheme. Even then, WNW has produced decal sheets with alternate markings for some of their kits. These can be found on their web page. What I really like is to go and see what Pheon Decals has for a kit. These are high quality decals that fit the WNW kits like a glove. Aviattic also has decals that replicate the ever elusive clear doped linen, bleached linen, lozenge, etc. I have Aviattic's "streaked Fokker" finish that I plan on using on a Triplane in the near future in 1/32 scale. I used it on Eduard's 1/48 scale triplane and really liked the look.
I don't mean to slight any other companies by not mentioning them. I only included ones I have already tried.
Mike Muth
|
Click on
images below to see larger images
|
|
|
|